In Good Taste

IN GOOD TASTE
In Good Taste OH 082024

Meltdown Turned Masterpiece

A brown-butter sugar cookie and raspberry ice cream sammie

Story and photography by Jasmine Comer

My sister’s devotion to ice cream is legendary. Once, years ago at a family gathering when she was 5, she dropped her ice cream cone on the ground and immediately had a, whoops, meltdown. You would’ve thought her cone had been the very last frozen treat in the world. Even today, her passion for ice cream still goes unrivaled in our family. She’s the inspiration behind this recipe.

There’s truly something about homemade ice cream. Unlike store-bought varieties, it is made with love — often with someone special in mind. You get to customize everything from flavors and textures to mix-ins. Watching the churner work its magic, transforming ingredients into a cool, creamy confection is pure summertime satisfaction. And that first bite of ice cream you made with your own hands? Sweetness that goes beyond flavor.

Go ahead and pull out all the stops by sandwiching raspberry ice cream between brown-butter sugar cookies. The crisp, buttery cookies cradle the velvety, tart-and-sweet raspberry ice cream for a symphony of balanced flavors and textures. To achieve a perfectly creamy texture, I use equal parts milk and cream in the ice cream base. The beauty of this recipe lies in its endless possibilities. You can replace the raspberries with any soft seasonal fruit. Just make sure to puree before stirring it into the base. And there’s nothing wrong with vanilla or chocolate ice cream. This recipe might be a labor of love, but it’s totally worth it. I can’t promise you won’t have a meltdown after the last of your ice cream sandwiches are gone, though.

Raspberry Ice Cream

(Recipe adapted from Buttermilk By Sam)

Ingredients

4 large egg yolks
1/2 cup granulated sugar
1 cup whole milk
1 cup heavy cream
12 ounces fresh raspberries
Pinch of salt
1/2 teaspoon vanilla extract

Directions

  1. In a pot over medium-low heat, add and mix the egg yolks, sugar, whole milk and heavy cream. Simmer until the mixture thickens and reaches a temperature of 165 degrees Fahrenheit.
  2. Transfer the mixture to a bowl.
  3. Meanwhile, puree the raspberries in a food processor.
  4. Stir the raspberries into the cream mixture. Place the mixture in the fridge overnight.
  5. Follow the instructions on your ice cream machine. Then transfer to a freezer safe container. 

Brown-Butter Sugar Cookies

Ingredients

1/2 cup butter, cubed
1/2 cup brown sugar
1/3 cup cane sugar
1 egg
1 teaspoon vanilla extract
1 cup flour
1/4 teaspoon baking powder
1/4 teaspoon baking soda
1 teaspoon cornstarch
Pinch of salt

Directions

  1. Place the butter in small pot over medium heat. Stir continuously. The butter will start to crackle and then it will stop. It will then become foamy. Keep stirring until you see brown bits in the bottom of the pot. Pour the butter into a glass bowl to cool.
  2. Once the butter is cooled, add it to a large bowl with the sugars. Whisk until combined. Then whisk in the egg and vanilla extract.
  3. Fold in the flour, baking soda, baking powder and cornstarch. Divide into eight balls.
  4. Refrigerate for at least 30 minutes, preferably overnight.
  5. Preheat the oven to 350 degrees Fahrenheit and place the chilled dough balls on a baking sheet lined with parchment paper.
  6. Bake for 8–10 minutes or until the edges are golden brown and the tops of the cookies are slightly puffy.
  7. Cool on the baking sheet for 5–7 minutes. Then transfer to a rack until completely cooled.
  8. Before assembling the ice cream sandwiches, it may be necessary to let the ice cream soften a bit. Let it sit out at room temperature until it is soft enough to scoop. Place a generous scoop of ice cream on one cookie. Then place another cookie on top and smash the ice cream until it spreads to the edges of the cookie sandwich.
  9. Enjoy!  OH

Jasmine Comer is the creator of Lively Meals, a food blog where she shares delicious, everyday recipes. You can find her on Instagram
@livelymeals.

In Good Taste

In Good Taste

When Winter Gives You Lemons . . .

Make savory salmon with tangy citrus butter

Story and Photograph by Jasmine Comer

Years ago, I had a culinary revelation — citrus fruits reign supreme in the depths of winter or when it simply won’t go away in March. How could a season so dark and chilly yield fruits so bright and tangy? How could such vivid sweetness thrive in a season painted in shades of gray? I had always associated lemons with summer and my seasonal childhood fav — ice-filled fresh lemonade. Nature never ceases to amaze me and, while I can’t explain why things are the way they are, I do know that every savory dish needs a dash of acidity. When I was preparing this recipe, I was reminded of a book by Samin Nosrat called Salt Fat Acid Heat. Nosrat believes that if you can master those four elements, you can master the kitchen. The trick? Balance — that delicate dance of flavors and textures. When done right, balance creates unforgettable meals, the kind your senses recall at their very mention. This recipe reminds me of that profound truth.

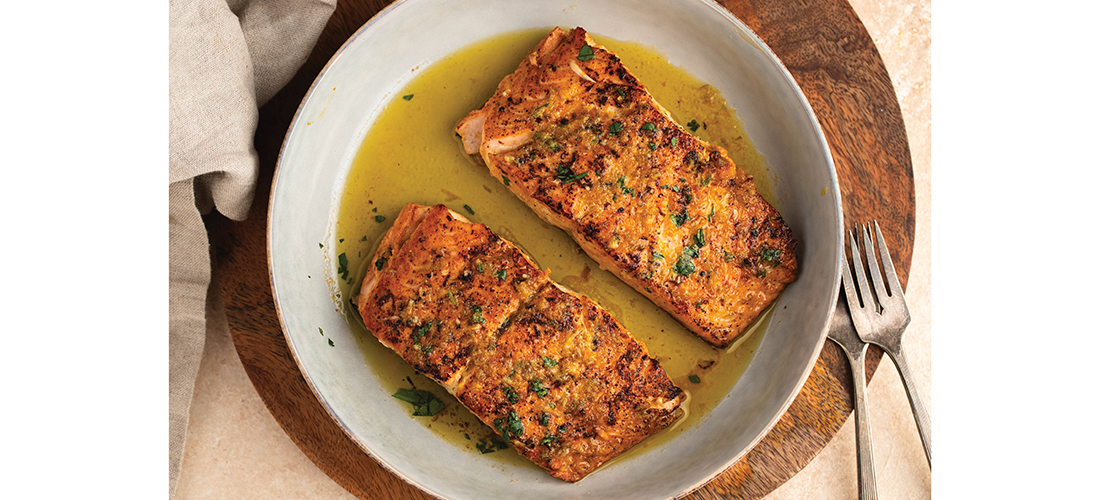
Salmon, rich in omega-3 fats, salted and seared, then basted in citrus butter, creates a melody of acidity and fat — and, of course, salt and heat —  that will delight your tastebuds. Even though this recipe is specifically for salmon, the citrus butter would also add a rich, zesty flavor to any type of vegetable, or even your favorite poultry or fish. Imagine roasted broccoli bathed in melted citrus butter or succulent roasted chicken with a tangy twist. I’m drooling already! Don’t be afraid to add fresh herbs such as earthy rosemary, which would also play nicely with the acidity of the citrus. Experiment — Meyer lemons would add a sweeter flavor, while grapefruits pair perfectly with rosemary, which happens to be readily available throughout the Southern winter. Rosemary salmon with grapefruit butter? Yes, please. This recipe is an invitation to let your creativity sizzle. You can’t go wrong, no matter how ya slice it.

Salmon with Citrus Butter

Ingredients

1/2 tablespoon olive oil

1 pound salmon with skin attached, cut into 4-ounce filets

Salt and pepper to taste

Fresh herbs for serving

Citrus Butter

1 stick salted butter, softened

1 teaspoon lemon zest

1 teaspoon lime zest

1 teaspoon orange zest

2 teaspoons fresh lemon juice

2 teaspoons fresh orange juice

Pinch of cayenne pepper, optional

Directions

Heat the olive oil in a large skillet over medium heat. Season the salmon lightly with salt and pepper.

Place the salmon skin side up in the skillet and cook for 3-4 minutes. Then flip and cook for 2-4 more minutes depending on the thickness of the salmon.

Meanwhile, place all the ingredients for the butter in a small bowl and mix until thoroughly combined.

Once the salmon is almost done cooking, reduce the heat to low and add a couple tablespoons of the citrus butter to the skillet, basting the salmon with the butter as it finishes cooking for about 2 more minutes.

Top with fresh herbs of your choice (I used cilantro). Serve immediately.  OH

Jasmine Comer is the creator of Lively Meals, a food blog where she shares delicious, everyday recipes. You can find her on Instagram @livelymeals.


In Good Taste

In Good Taste

A Bowlful of Comfort

Chilly weather calls for chili cooking!

Story and Photograph by Jasmine Comer

There’s more than one way to skin a potato, even a sweet potato — and there are just as many different ways to make chili. No matter the region, I think we can all agree that it’s the perfect cozy meal for those chilly wintry months. Some insist that chili requires specific ingredients like beans, or ground beef, or chicken, but I beg to differ. For me, the only requirement is the right combination of warm spices to exhilarate your palate — and a recipe tested by time (and your family). 

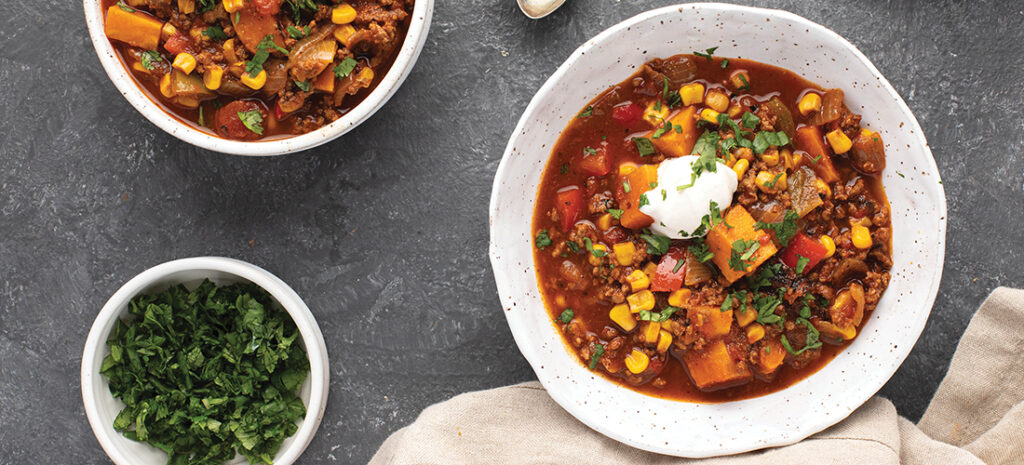
My sweet potato chili has some of your typical seasonings such as chili powder and cumin. But the addition of the fiery cayenne pepper and savory cinnamon along with silky sweet potatoes will make your tastebuds dance the salsa . . . and maybe even sing along. For me a pot of sweet-potato chili on the stove brings me right back to my childhood seat at the family table. I can see my mother stirring the pot at the stove while the rest of us sit around the table listening to my granddad’s jokes followed by his contagious laughter. On these cold evenings, the house is filled with the fragrant scent of exotic spices and boisterous laughter, though I wasn’t always sure of just what was so funny. But it doesn’t even matter. I just enjoyed seeing everyone having a good time while anticipating a sweet-and-sour-and-spicy bowl of momma’s chili, which I have only slightly modified. 

And the best news about this recipe? You probably have most of the spices in your pantry already. Have a little fun with it — doctor the flavors to your liking or try different combinations. I, for instance, add tamari or soy sauce to my chili instead of salt. It adds depth of flavor and umami to the dish. Not a fan of red meat? Use ground turkey instead of beef. Or omit the meat altogether and add your favorite beans or some Impossible Burger. Go ahead and play with your food. Whatever you do, just don’t forget to cook with love. That’s exactly what my family does and, inevitably, it means no leftovers. A sign of a delicious meal? When everyone wants a bowl to go.


Sweet Potato Chili

Ingredients

1 pound ground beef

1 yellow onion, chopped

1 red bell pepper, chopped

1 green bell pepper, chopped

4 garlic cloves, minced

1/2 teaspoon each: smoked paprika, black pepper, oregano

1/4 teaspoon cinnamon

1 teaspoon cumin

1 teaspoon salt

2 tablespoons chili powder

Pinch of cayenne pepper

2 tablespoons tomato paste

2 cups sweet potatoes, peeled and cubed

15-ounce can fire-roasted tomatoes

15-ounce can corn, drained

1 1/2 cups beef broth

Directions

  1. In a Dutch oven or heavy-bottomed pot, brown the ground beef over medium heat, using a wooden spoon to break into crumbles. Once the ground beef is browned, remove it from the skillet and set it aside. If using a fatty meat, drain all but 1 tablespoon of oil from the pot.
  2. Add the onion and peppers. Cook until softened, stirring frequently. Add the chopped garlic and cook until fragrant, about 1 minute or so.
  3. Add the remaining spices and stir to combine. Cook for two more minutes, reducing a the heat a little so the spices don’t burn.
  4. Stir in the tomato paste and cook for 2–3 more minutes, or until slightly caramelized. 
  5. Stir in the sweet potatoes, fire-roasted tomatoes, corn, beef broth and the cooked ground beef. 
  6. Bring the mixture to a boil, then reduce the heat to low and simmer for 25–30 minutes or until the potatoes are tender.

Suggested toppings: sour cream, lime juice, corn chips and cilantro OH

Jasmine Comer is the creator of Lively Meals, a food blog where she shares delicious, everyday recipes. You can find her on Instagram @livelymeals.


In Good Taste

In Good Taste

A Slice of Summertime

A savory “fruit” tart

Story and Photograph by Jasmine Comer

I used to think that all produce was the same. But when it’s grown on local farms or even in your own backyard with a lot of love and care, you definitely can taste the difference.

When I was growing up, I didn’t particularly care for tomatoes. My mom would make BLTs and she had to watch me peeling them off the sandwich. They say your taste buds change every seven years. I’m not sure how true that is, but as I get older, I’m learning to love what my mother knew was one of nature’s sweetest, yet savory fruits. Sure, eat them raw, but roasting them, as in a tomato tart with Gruyère cheese, brings out their sweet, robust flavor. Either way, you can’t lose.

When it comes to summer meals, I want something light and refreshing. This crispy tart checks those boxes, with basil adding a sweet, peppery note. And the addition of three kinds of cheese — buttery Gruyère, cream and Swiss — helps balance the sweet and sour of the tomatoes. I’m all about having the perfect combinations of textures and flavors when it’s time to eat. After all, a winning recipe is all about balance. And, please, adapt it to your own taste with your choice of cheese and herbs. Trust your intuition and go with what the heart wants when you’re in the kitchen.

There’s no right or wrong way to do anything when it comes to cooking. My only rules? Don’t overthink and have fun. I hope this recipe will be something you can enjoy creating — and eating! — in your kitchen this summer.

Roasted Tomato Tart with Gruyere

Ingredients

1 puff pastry sheet

1 egg, beaten

3 ounces cream cheese, brick style, softened

1/3 cup shredded Gruyère cheese

1/3 cup shredded Swiss cheese

3/4 teaspoon dried basil or 1 tablespoon chopped fresh basil

2-3 medium tomatoes, sliced

Grated parmesan and basil for serving

2 tablespoons fresh basil for serving

2 tablespoons grated parmesan for serving

Salt and pepper to taste

Directions

Preheat oven to 400°F. Place the puff pastry on a baking sheet lined with parchment paper. Cut into six pieces. Use a sharp knife to score the edges of each piece of the puff pastry leaving about an inch all the way around.

Brush the border of each piece of puff pastry with the egg wash.

In a small bowl, combine the cream cheese, gruyère cheese, Swiss cheese and dried basil. Add salt to taste.

Spread the cream cheese mixture onto each piece of puff pastry, using about a tablespoon per piece.

Slice the tomatoes about a quarter of an inch thick. Place them on a plate or surface of your choice lined with paper towels. Salt the tomatoes. This will draw the moisture out of them and intensify the flavor. Let them sit for six to seven minutes.

Layer the tomatoes onto each piece of puff pastry. Season with pepper. Bake for 20–25 minutes or until the edges of the puff pastry are golden brown.

Top with fresh basil and parmesan if desired.  OH

Jasmine Comer is the creator of Lively Meals, a food blog where she shares delicious, everyday recipes. You can find her on Instagram @livelymeals.